Chrome拡張機能のcontent scriptでdaisyUIを使う
Chrome拡張機能のcontent scriptでdaisyUIを使うには少々工夫が必要です。本記事ではその方法と実例を紹介します。
## 何が問題?
何も考えずにTailwind CSSやdaisyUIを入れると、意図しない箇所のスタイルに影響を与えてしまいます。
ここでは例としてexample.comを使います。通常は次のとおりです。

ここで、工夫無しにTailwind系のCSSを使ったcontent scriptを差し込むと次のようになります。
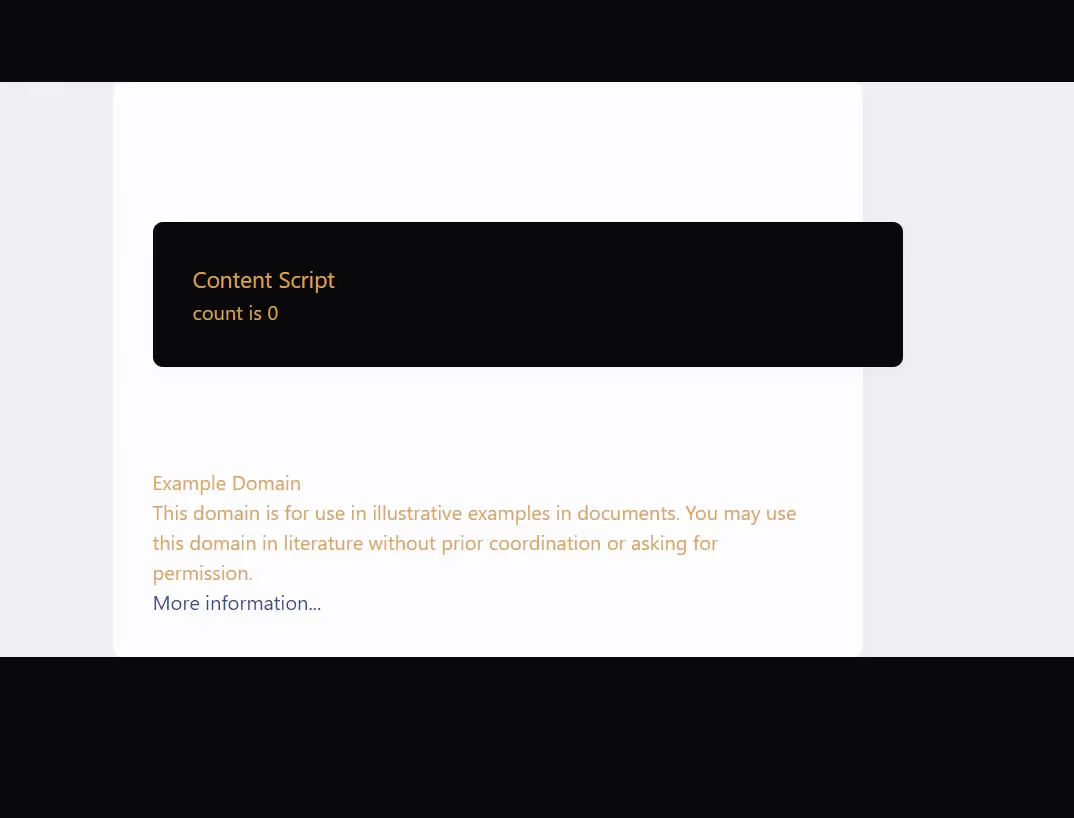
上下の黒い帯、文字の大きさ、色、余白などいろいろ変わってしまっていますね。
もちろん「スタイルの変更が目的」であれば問題ありません。しかし、独自のUIを差し込みたいだけの場合は問題になります。
## まずセレクタをつける
Tailwindはブラウザ間の差異を無くすためにCSSをリセットしています。daisyUIであればデフォルトの背景色や文字色を変えます。
そこで、TailwindやdaisyUIで扱うCSSのセレクタにprefixをつけます。
### postcss-prefix-selectorの追加
今回はpostcss-prefix-selectorを使いました。
module.exports = { plugins: { tailwindcss: {}, "postcss-prefix-selector": { prefix: "#crxNameHere", }, autoprefixer: {}, },};セレクタとしては.fooが#crxNameHere .fooになるイメージです。この場合、idcrxNameHereの要素より下の要素だけにTailwind CSSを適用できます。
### prefixが適用できるように変更
実際にセレクタとしてprefixが含まれるようにいくつか変更します。
content scriptで、Tailwindを使いたい範囲のルートとなる要素にprefixを書きます。
<div id="crxNameHere" class="bg-base-100">  <h1 class="text-lg">Content Script</h1>  <!-- ... -->
</div>
PopupやOptionsも変えます。
<body id="crxNameHere"> <script type="module" src="./main.ts"></script></body>import "./app.css"; // tailwindのディレクティブを書いたCSSimport App from "./App.svelte";
const app = new App({ // biome-ignore lint/style/noNonNullAssertion: <explanation> target: document.getElementById("crxNameHere")!,});
export default app;Tailwindだけを使っているならここまでで完了です。
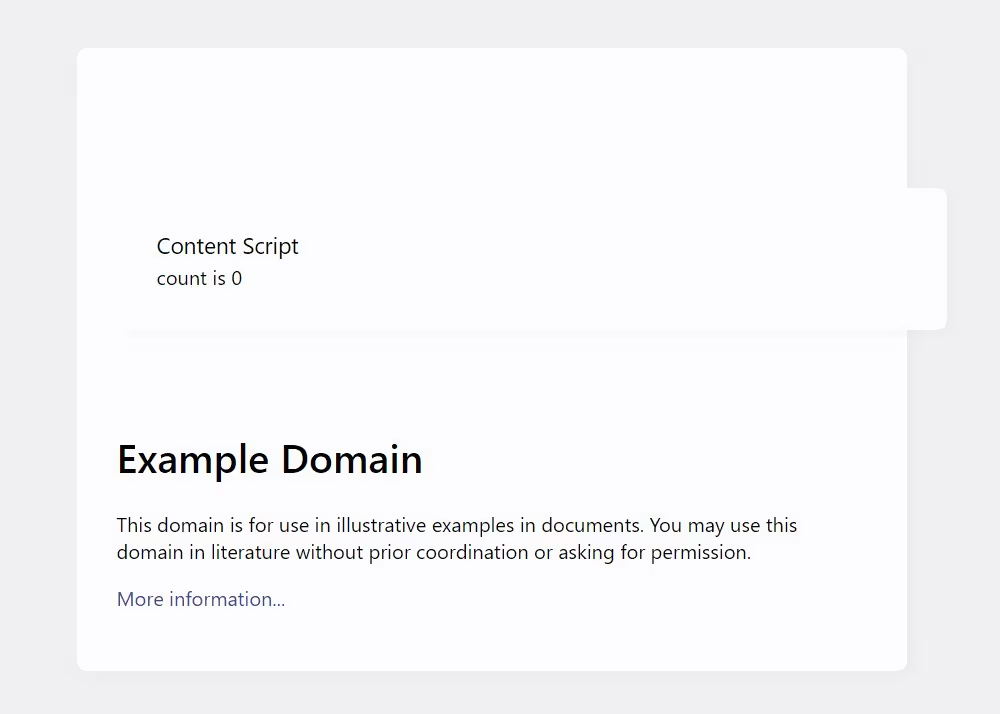
daisyUIを使う場合、まだcontent scriptで差し込む要素にテーマが反映されません。
この時点では次のようになります。
## daisyUIのセレクタを変える
GitHubで実装(1、2)を見ると、セレクタに:rootやhtmlが使われています。
今回ルートとしたいのはpostcss-prefix-selectorで指定したセレクタ(#crxNameHere)です。このままでは#crxNameHere htmlのような無効な親子関係のセレクタになってしまいます。
### transformの関数を追加
幸いにもpostcss-prefix-selectorでは「prefixを柔軟に変更できる関数」を用意できます。postcss.config.jsを次のように書き換えます。
function transformSelector(prefix, selector, prefixedSelector) {  // daisyUI: src/base/colors.css  if (selector.match(/:root/)) {    return selector.replace(/:root/, prefix);  }
  // daisyUI: src/base/general.css  if (selector.match(/html/)) {    return selector.replace(/html/, prefix);  }
  return prefixedSelector;}
module.exports = { plugins: { tailwindcss: {}, "postcss-prefix-selector": { prefix: "#crxNameHere", transform: transformSelector, }, autoprefixer: {}, },};やっていることは単純で、セレクタの:rootやhtmlをprefixに置換します。
## 解決方法のまとめ
そんなわけでまとめです。
- セレクタにprefixをつけるように変換
- (daisyUIなら加えて)セレクタの
:rootやhtmlをprefixに置換
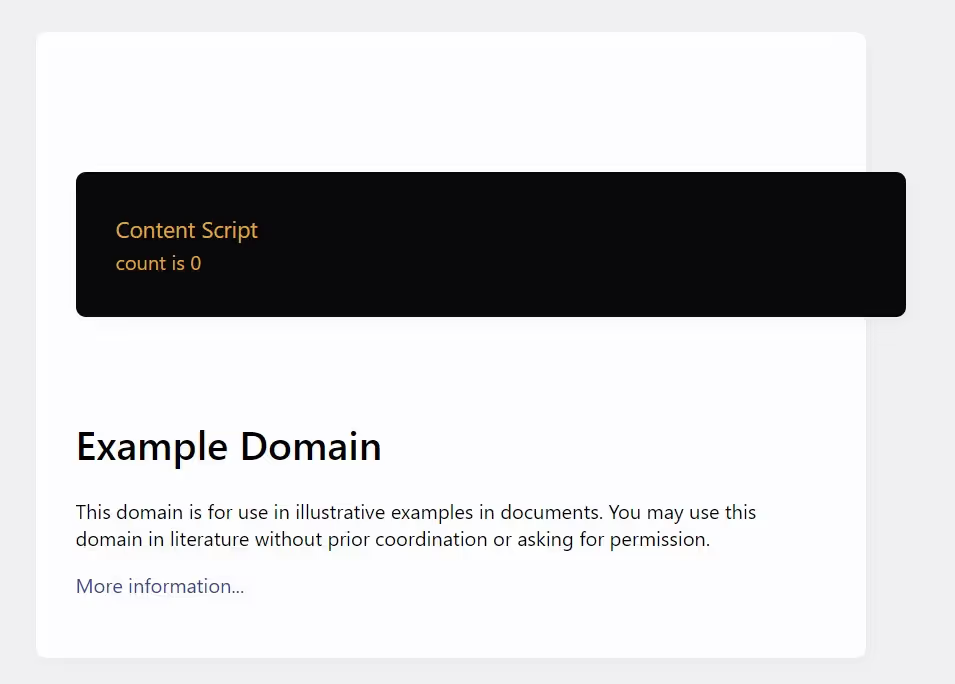
次の画像がcontent scriptで差し込む部分だけにdaisyUIを適用させた例です。
## 実例
今回実際にcontent scriptでdaisyUIを使っている例を用意しました。参考程度にどうぞ。
eetann/wxt-content-daisyui | GitHub
上記の例ではChrome拡張機能のフレームワークWXTを使っています。
サクッと作りたい時に、focusやクリックも統一感を持たせることができてdaisyUIは便利です。